Upscale Image
The Upscale Image node increases the resolution of a single image using AI super-resolution engines (Topaz, AuraSR, Creative Upscaler, ESRGAN).

What does the Upscale Image node do?
The Upscale Image node increases the resolution of a single image using AI super-resolution. It dispatches to one of four engines — Topaz, AuraSR, Creative Upscaler, or ESRGAN — selected through the LLM model picker. Each engine exposes its own sub-models and parameters tuned for different content types (photos, AI art, anime, documents).
Common use cases:
- Enhance low-resolution product photos for e-commerce listings or marketplaces.
- Upscale AI-generated images to print-ready or retina-display resolution.
- Restore old, scanned, or heavily compressed photos with reconstructed detail.
- Sharpen documents, screenshots, and infographics before publication.
Quick setup
Follow these steps to add and configure the Upscale Image node in your workflow:
Add the node to the canvas
Open the Node Library, go to AI > Image, then drag and drop the Upscale Image node onto your workspace.
Select an upscaling model
In the node settings, pick a model in the Model name selector. The model you choose decides which engine runs (Topaz, AuraSR, Creative Upscaler, or ESRGAN) and which parameter section becomes editable.
Connect a single image
Connect the input port to a node that produces one image (Static Image, Text to Image, Image to Image, File, Google Drive, Web Scraper). Arrays of images are rejected — disable any “Multiple files” toggle on the source node.
Configure scale and engine parameters
Set the Upscale Factor (1 to 8, capped per engine) and tune the model-specific fields (sub-model, sharpen, denoise, creativity, variant, etc.).
Connect the output
Connect the output port to a downstream node (for example a Loop body, an export node, or a WordPress Post Create) and reuse the upscaled image.
Configuration parameters
The node ships with one common section plus four engine-specific sections. Only the section matching the selected Model is honored at runtime — values in other sections are ignored.
Required fields
Name string required default: Upscale Image Node name — Identifier shown on the canvas. Rename it to match the role (e.g. “Upscale product photo 2x”) to make logs and debugging easier.
Description string required default: Upscale and enhance image resolution using AI models (Topaz, AuraSR, Creative Upscaler, ESRGAN) Node description — Short reminder of what this instance does in your workflow.
Model name LLM selection required Upscaling engine — LLM-style picker that selects one of the four engines. Mapping to the internal model key:
| Selection | Internal model | Max scale | Best for |
|---|---|---|---|
| Topaz Upscale | topaz | 4x | Professional photo upscaling, 10 specialized sub-models |
| AuraSR | aura-sr | 4x | Fast, lightweight upscaling with minimal config |
| Creative Upscaler | creative-upscaler | 5x | AI-driven creative enhancement (Stable Diffusion 1.5 / SDXL) |
| ESRGAN | esrgan | 8x | Maximum scale factor, anime variants, batch processing |
The node fails validation with requires a model to be selected until a model is picked.
image image (single) required Source image — Single image connected to the input port. Arrays are rejected (Static Image with multiple URLs, File / Google Drive with “Multiple files” enabled, Google Drive Reader with multiple files). Wrap the node in a Loop if you need batch processing.
Upscale Factor number required default: 2 Scale multiplier — Integer from 1 to 8. The effective maximum is capped by the engine (Topaz 4x, AuraSR 4x, Creative 5x, ESRGAN 8x). Higher values produce larger files and longer runtimes.
Optional fields — Common
Output Format string default: jpeg Output image format — jpeg or png. Some engines have a fixed output format and will ignore this value.
Error Handling string default: None Error handling strategy — None stops the workflow on failure. Skip swallows the error and continues with no output for this node.
Optional fields — Topaz
Professional-grade upscaler with 10 specialized sub-models split into two families.
Core sub-models: Standard V2, Low Resolution V2, CGI, High Fidelity V2, Text Refine.
Generative sub-models: Recovery, Recovery V2, Redefine, Standard MAX, Wonder.
Some fields below are only honored by a subset of sub-models (visibility matrix lives in the node settings UI).
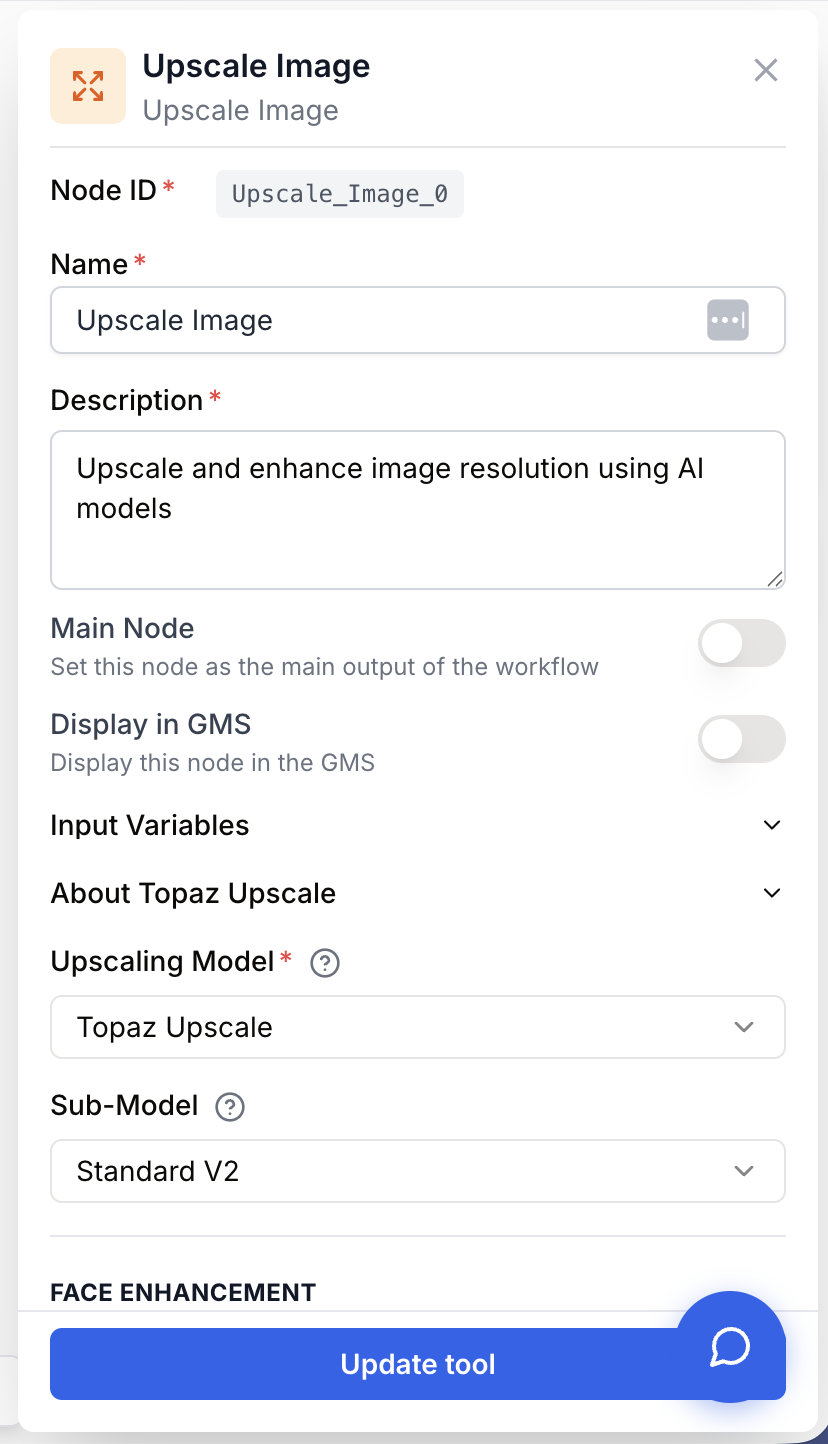
Topaz Sub-model string default: Standard V2 Sub-model that handles the actual upscale. Pick High Fidelity V2 for professional photos, Text Refine for documents, Recovery V2 for very low-resolution sources, Redefine for prompt-guided restoration.
Face Enhancement boolean default: false Enable face-specific enhancement (Standard V2 and Recovery V2 only). Pairs with the three face-related sliders below.
Face Enhancement Strength number default: 50 How aggressively faces are enhanced. Range 0–100.
Face Enhancement Creativity number default: 50 How much creative liberty the model takes when reconstructing faces. Range 0–100.
Face Detection Sensitivity number default: 30 Threshold above which a region is treated as a face. Range 0–100.
Sharpen string Sharpening amount as a numeric string. Honored by Standard V2, Low Resolution V2, CGI, High Fidelity V2, Text Refine, Redefine.
Denoise string Noise reduction amount as a numeric string. Same sub-model coverage as Sharpen.
Fix Compression string JPEG compression artifact removal. Honored by Standard V2, Low Resolution V2, High Fidelity V2, Text Refine.
Subject Detection string default: All Region to enhance — All, Foreground, or Background. Used by Standard V2 and Recovery V2.
Strength (Text Refine) number default: 0.5 Text Refine sub-model strength, 0–1 step 0.01.
Detail (Recovery V2) number default: 0.5 Recovery V2 detail amount, 0–1 step 0.1.
Creativity (Redefine) number default: 3 Redefine creativity slider, integer 1–6. Higher = more invented detail.
Texture (Redefine) number default: 3 Redefine texture amount, integer 1–5.
Prompt (Redefine) string Free-text prompt that guides the Redefine generative pass.
Auto-prompt (Redefine) boolean default: true When enabled, Redefine derives its own prompt from the image and ignores the manual Prompt field.
Optional fields — AuraSR
Checkpoint (AuraSR) string default: v2 Checkpoint version: v1 or v2. v2 is the current default and produces sharper results.
Overlapping Tiles boolean default: true Use overlapping tiles to hide seams in the upscaled output. Disable only if you see ghosting or duplication.
Optional fields — Creative Upscaler
Architecture (Creative) string default: SDXL Stable Diffusion backbone: SD_1_5 (faster, lighter) or SDXL (higher fidelity, slower).
Creativity (Creative) number default: 0.5 Creative liberty, 0–1 step 0.1. Higher values let the model invent texture and detail.
Detail (Creative) number default: 1.0 Detail amount added during diffusion, 0–5 step 0.5.
Shape Preservation number default: 0.25 How tightly the output sticks to the source shapes, 0–3 step 0.25. Lower values let the model deviate more.
Guidance Scale number default: 7.5 Classifier-free guidance scale, 0–16 step 0.5. Higher values follow the prompt more strictly.
Inference Steps number default: 20 Number of diffusion steps, 1–200. More steps = higher quality and longer runtime.
Negative Prompt string Text describing what to avoid (e.g. blurry, artifacts, noise, lowres).
Seed string Optional seed for deterministic output. Leave empty for a random seed.
Override Size Limits boolean default: false Bypass the engine’s default size guard. Enable only when you accept the longer runtime and higher cost on very large inputs.
Optional fields — ESRGAN
Variant (ESRGAN) string default: RealESRGAN_x4plus Real-ESRGAN model variant.
| Variant | Description |
|---|---|
RealESRGAN_x4plus | General photography, best overall quality (default) |
RealESRGAN_x2plus | 2x scale, faster than x4plus |
RealESRGAN_x4plus_anime_6B | Anime / manga line art, preserves clean lines |
RealESRGAN_x4_v3 | General photography, fastest variant |
RealESRGAN_x4_wdn_v3 | Noisy images, built-in denoising |
RealESRGAN_x4_anime_v3 | Anime / illustration, lightweight |
Face Upscaling (ESRGAN) boolean default: false Run a face-specific second pass for sharper facial detail.
Tile Size number default: 0 Tile size for processing. 0 = no tiling. Smaller tiles use less GPU memory but may introduce visible seams.
Only the parameter section that matches the selected Model name is read by the runner. Switching engines mid-workflow does not erase the other sections — your previous tuning is preserved if you switch back.
What does the node output?
The node outputs an array of upscaled images in the standard ImageGallery format used across the AI image nodes. Even though Upscale Image processes a single source image, the output is wrapped as an array so it plugs directly into nodes that expect an image gallery (Loop, Static Image, exporters).
output image[] Array of upscaled images. Each entry exposes a url to the upscaled file and a format field reflecting the chosen output format.
[
  {
    "url": "https://cdn.fal.media/files/upscaled-image-...",
    "format": "jpeg"
  }
]
How to use the output
In Draft & Goal:
- Draw a connection from the Upscale Image output port.
- Connect it to the next node’s input.
- In that next node, create and name your own variable (for example,
upscaled_image). The image array is injected automatically.
Usage examples
Example 1: 2x photo upscale with Topaz High Fidelity V2
Use Topaz with the High Fidelity V2 sub-model at 2x to upscale product photos while preserving fine grain and texture. Enable Sharpen and Fix Compression for images sourced from the web or e-commerce catalogs.
Configuration:
Model name: Topaz UpscaleUpscale Factor:2Topaz Sub-model:High Fidelity V2Sharpen:0.3Fix Compression:0.5Output Format:jpeg
Example 2: AI-art enhancement with Creative Upscaler (SDXL)
After generating an image with Text to Image, connect it to Upscale Image with the Creative Upscaler engine on the SDXL backbone. Use a moderate creativity and a strict negative prompt to keep the result clean.
Configuration:
Model name: Creative UpscalerUpscale Factor:4Architecture (Creative):SDXLCreativity (Creative):0.5Detail (Creative):1.5Guidance Scale:7.5Inference Steps:30Negative Prompt:blurry, artifacts, noise, lowres, jpeg
Example 3: Batch upscale inside a Loop with ESRGAN
Place Upscale Image inside a Loop to process a list of images. Use ESRGAN with RealESRGAN_x4plus for a good speed-quality balance across large batches; switch to RealESRGAN_x4_wdn_v3 if the source images are noisy.
Configuration:
Model name: ESRGANUpscale Factor:4Variant (ESRGAN):RealESRGAN_x4plusFace Upscaling (ESRGAN):trueTile Size:512(lower this if you hit GPU memory limits)
Common issues
The connection from my image source is rejected
Cause: Upscale Image processes one image at a time. The source node is producing an array (Static Image with multiple URLs, File / Google Drive with “Multiple files” enabled, Google Drive Reader with multiple files).
Solution: Disable the “Multiple files” toggle on the source node, or wrap Upscale Image in a Loop node and feed it one image per iteration.
The node fails with requires a model to be selected
Cause: No engine has been picked in the Model name selector. The validator blocks the workflow before it reaches the runner.
Solution: Open the node settings and select Topaz, AuraSR, Creative Upscaler, or ESRGAN. Make sure your plan grants access to the chosen engine.
The output looks blurry or oversmoothed
Cause: The chosen sub-model or variant doesn’t suit the input. Topaz Core sub-models can flatten textures on AI art; ESRGAN base variants can struggle on noisy sources.
Solution: For Topaz, switch from a Core sub-model to a Generative one (Recovery V2, Redefine, Wonder). For ESRGAN, try RealESRGAN_x4_wdn_v3 for noise or RealESRGAN_x4plus_anime_6B for illustration. Bump up the Sharpen value if the engine supports it.
Faces are distorted or hallucinated
Cause: Generative sub-models can invent facial detail at high scale factors. Generic upscaling without a face pass leaves faces soft.
Solution: On Topaz Standard V2 or Recovery V2, enable Face Enhancement and tune the strength / sensitivity sliders. On ESRGAN, enable Face Upscaling. Reduce the upscale factor (try 2x instead of 4x) when faces still drift.
The job times out or runs out of memory
Cause: The source image is too large for the chosen engine, or the inference budget is exhausted (Creative Upscaler with very high Inference Steps).
Solution: Resize the source image before upscaling, lower the Upscale Factor, drop ESRGAN’s Tile Size to chunk the work, or reduce Creative Upscaler’s Inference Steps. Set Error Handling to Skip if the workflow must keep running on failures.
Best practices and pitfalls
Start at 2x with the engine that matches your content (Topaz for photos, ESRGAN for batches, Creative for AI art, AuraSR for speed). Validate quality on one image before scaling the workflow up. Doubling resolution is usually enough and produces the most reliable results.
Generative sub-models can hallucinate. Topaz Recovery V2 / Redefine / Wonder and Creative Upscaler invent detail that wasn’t in the source. Avoid them on legal, medical, or evidence-grade imagery — stick to Core Topaz sub-models or ESRGAN, and inspect the output before publication.
How does it fit into a workflow?
Upscale Image typically sits between an image-producing node and an export or post-processing step.
graph LR
    Source[Static Image / File / Web Scraper] --> Upscale[Upscale Image]
    TextToImage[Text to Image] --> Upscale
    Upscale --> AspectRatio[Change Aspect Ratio]
    AspectRatio --> WP[WordPress Post Create]
Related nodes
Transform or restyle an image with AI before or after upscaling.
Generate a base image, then send it through Upscale Image for print-grade resolution.
Crop or pad the upscaled image to fit a target ratio (1:1, 16:9, 4:5).
Pin a fixed image as input — make sure “Multiple files” is off for Upscale Image.
Wrap Upscale Image in a Loop to process arrays of images one at a time.