Quickstart
Build your first workflow in 5 minutes
Overview
In this quickstart, you’ll create a simple workflow that:
- Takes a URL as input
- Scrapes the webpage content
- Uses AI to generate a summary
By the end, you’ll understand the basics of building workflows in Draft & Goal.
Prerequisites: You need a Draft & Goal account.
Step 1: Create a new workflow
Open the Studio
Go to studio.dng.ai and log in to your account.
Create a workflow
Click New Workflow in the top-right corner. Give it a name like “My First Workflow”.
Open the canvas
You’ll see an empty canvas — this is where you’ll build your automation.
Step 2: Add an input node
Every workflow needs a starting point. We’ll add a Text Input node to accept a URL.
Open the node library
Click the Add Node button in the left sidebar to open the node library.
Find the URL node
Search for “Url” or browse to Inputs → Url.
Add it to the canvas
Click on the node to add it to your canvas. This node will accept a URL when you run the workflow.
Step 3: Add a Web Scraper node
Now we’ll add a node to fetch the content from the URL.
Add the Web Scraper
Click Add Node again and search for “Web Scraper”. Add it to the canvas.
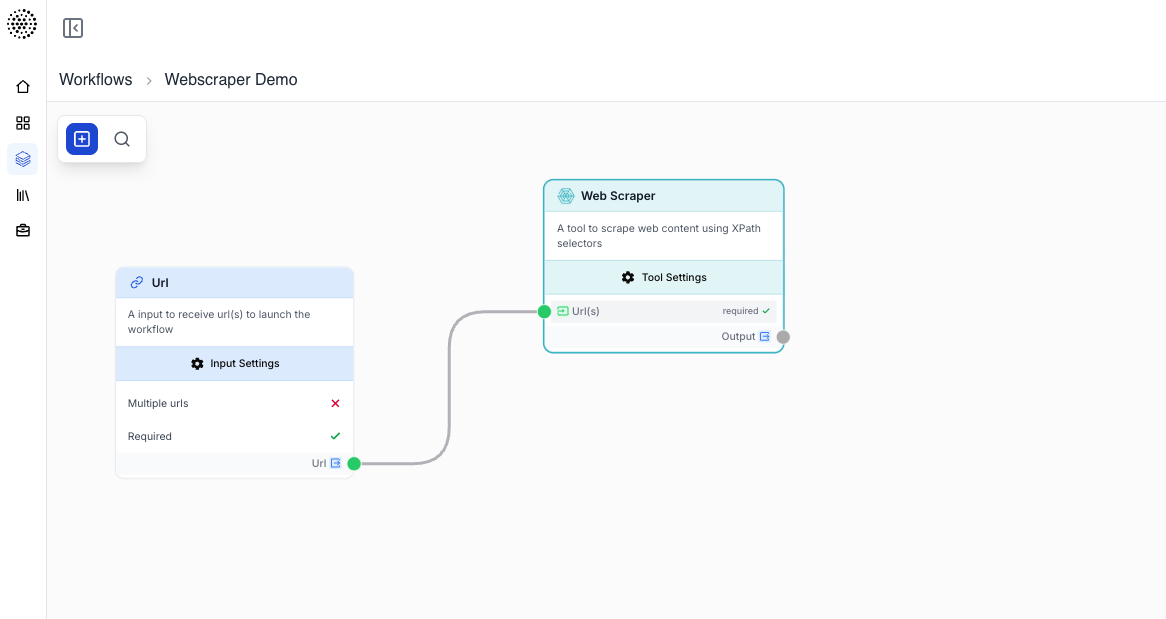
Connect the nodes
Drag a connection from the output of the Text Input node to the URL input of the Web Scraper node.
Configure the scraper
Click on the Web Scraper node. In the URL field, you’ll see it’s connected to the previous node’s output (shown as {{Text_0.value}}).
Variables like {{var}} automatically pass data between nodes. You don’t need to hardcode values!
Step 4: Add an LLM node
Let’s use AI to summarize the scraped content.
Add the LLM node
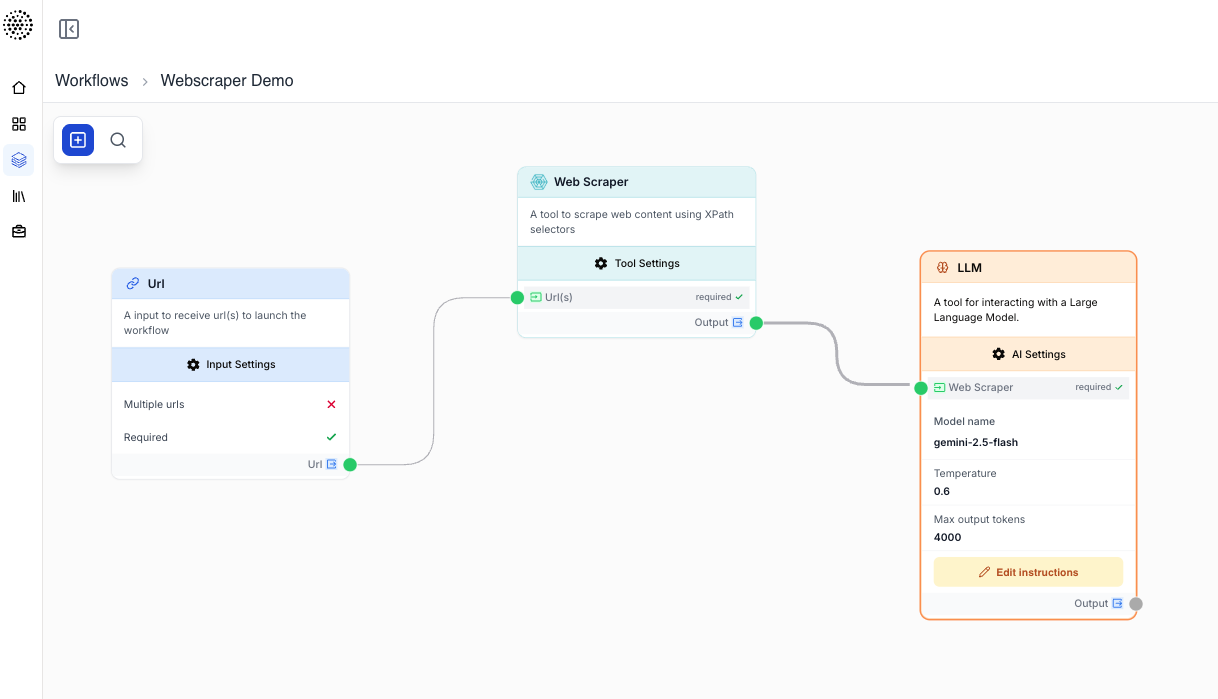
Click Add Node and search for “LLM”. Add it to the canvas.
Connect it
Connect the Web Scraper’s output to the LLM node.
Write your prompt
In the LLM node settings, set the Instructions to:
Summarize the following webpage content in 3 bullet points:

{{WebScraper}}
Choose a model
Select a model like Gemini or Claude from the Model dropdown.
Step 5: Run your workflow
Your workflow is ready! Let’s test it.
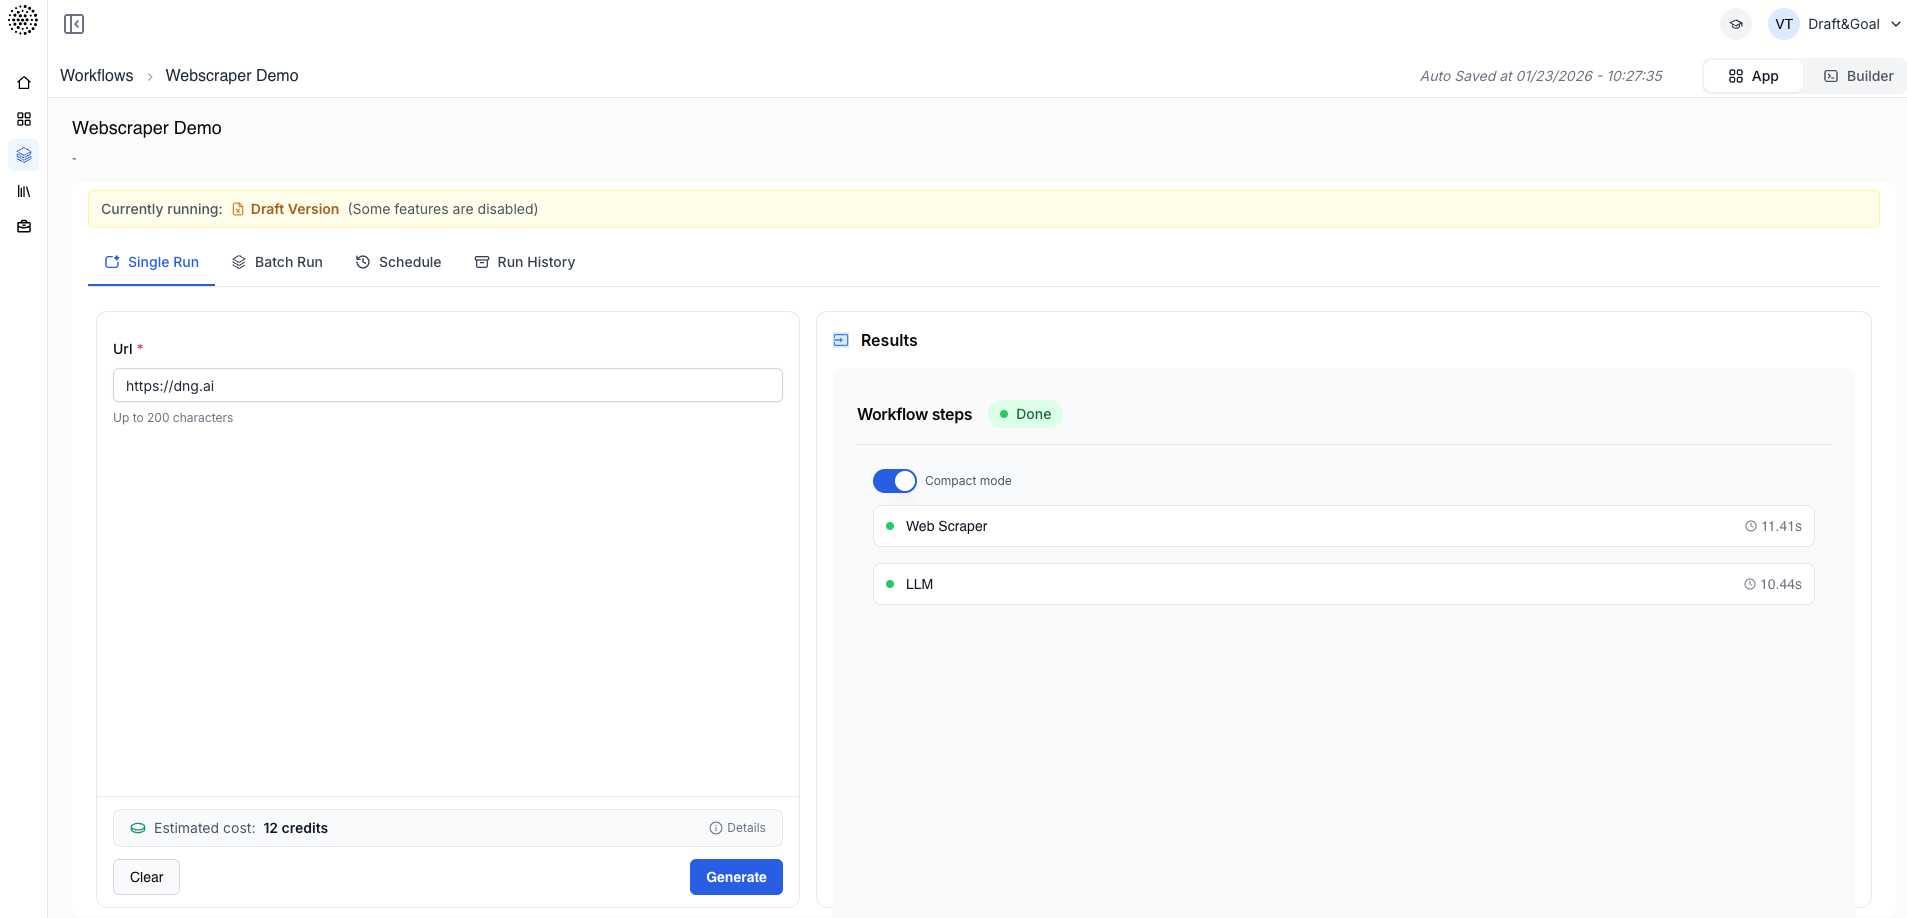
Click the App button
Click the App button in the top-right corner of the canvas.
Enter a URL
In the input form, enter a URL to scrape, like https://example.com.
Run the workflow
Click Generate and watch your workflow execute. You’ll see real-time progress for each node.
View the results
Once complete, you’ll see the AI-generated summary in the output panel.
What you learned
- How to create a new workflow
- How to add and configure nodes
- How to connect nodes using variables
- How to run and test your workflow